This guide outlines the main steps that you need to follow to enable and configure the WProofreader plugin for WordPress.
The WProofreader plugin for WordPress checks spelling and grammar in multiple languages on websites, built with WordPress 4 and WordPress 5.x. For more details, installation instructions, and FAQs on WProofreader Cloud plugin for WordPress, refer to its description page.
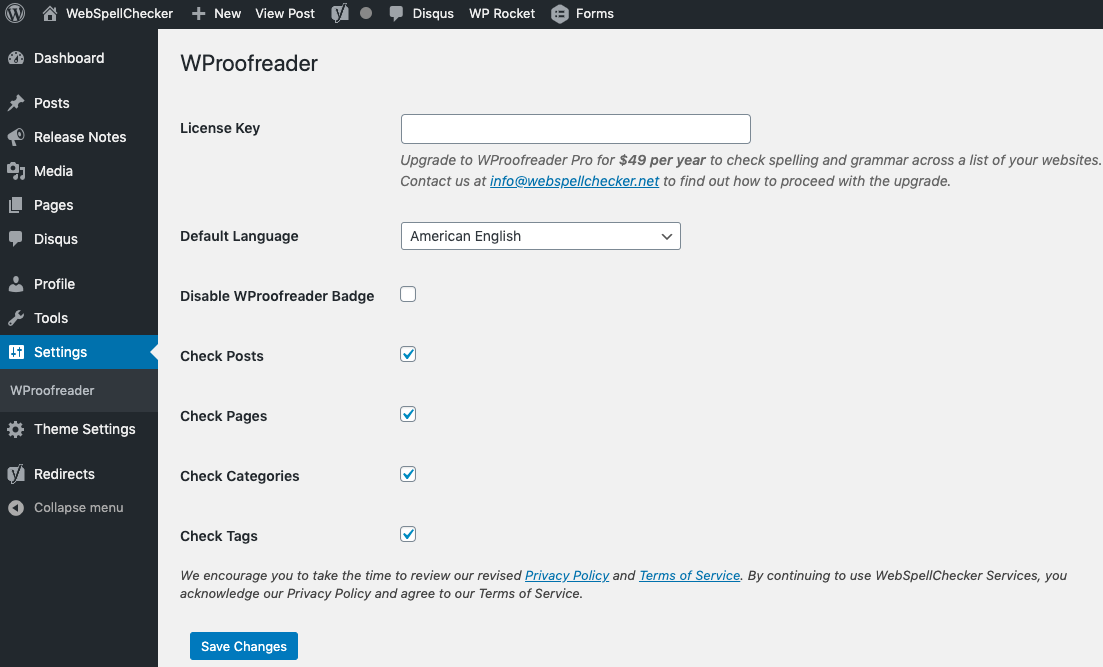
After you have installed the plugin following the installation instructions, you need to request a license and activate a Pro version of WProofreader plugin for WordPress to experience its proofreading features and specify its settings. You can do it from the WordPress Administration console, Settings tab shown below.
Activating WProofreader in WordPress
To activate WProofreader in WordPress, you need a license key for migration to the Pro version of the WProofreader plugin.
Once you have received a WProofreader Pro version license, paste it into the License key field and click Save Changes.
Selecting a Default Language
Select the default language for checking from the Default Language drop-down list. See the list of default supported languages for details.
Enabling and disabling WProofreader badge
If WProofreader badge is disabled, it is removed from the user interface, and all the action items are moved to the suggestion baloon.
Choosing the content type to proofread
Specify which WordPress content category WProofreader should check by selecting one or all available options:
- Posts
- Pages
- Categories
- Tags