Page History
1. Overview
The custom dictionary is a special mechanism that allows creating company-wide dictionaries that are intended to extend the vocabulary of the standard dictionary with custom words specific to your industry, domain, etc. All the words added to a custom dictionary will be available for all users of a web application within a company. The custom dictionaries for Cloud customers are saved and stored on the WebSpellChecker Cloud servers. Such dictionaries can be created and modified only by a person who is authorized to access to the account panel on the webspellchecker.net website.
| Panel | ||||
|---|---|---|---|---|
|
2. Availability
The custom dictionary functionality is available for all customers who are holding a Trial or Paid subscription to Cloud WebSpellChecker Services.
| Tip |
|---|
Good to know:
|
3. How to Get Started
It is easy to get started with the custom dictionary functionality.
| Excerpt Include | ||||||
|---|---|---|---|---|---|---|
|
- Find the Dictionaries section on the main page of your account. First of all you need to add a new dictionary. As soon as new dictionary is added, it will be displayed on the list of your custom dictionaries.

4. Create Custom Dictionary
4.1. Go to the Dictionaries section and click Add Custom Dictionaries.
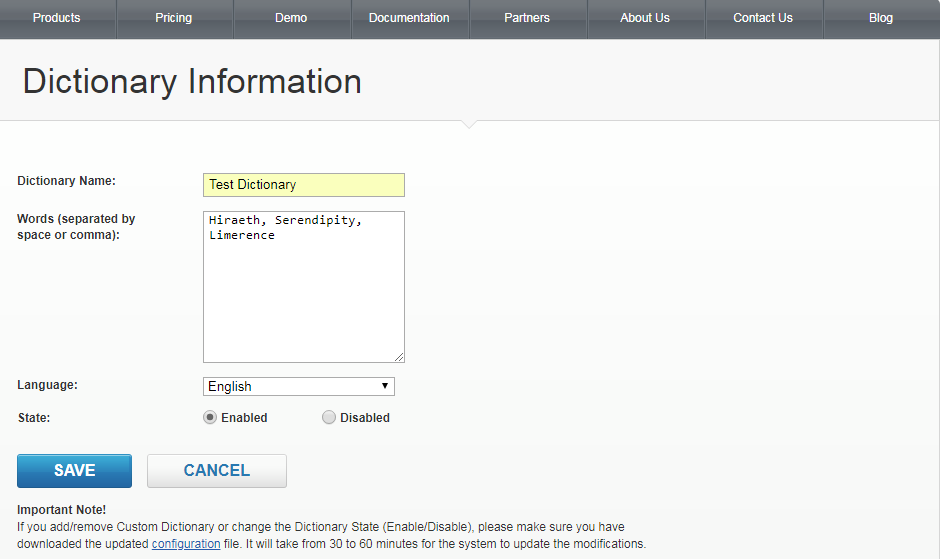
4.2. Fill in all the necessary fields to create a new custom dictionary and click Save.
- Enter a dictionary name;
- Enter or copy/paste words separated by space or comma that you want to appear in the dictionary.
| Note |
|---|
The maximum allowed size of a single custom dictionary is two million symbols including spaces and commas. |
- Select a language to apply a new custom dictionary for. The words from this custom dictionary will be used to extend the default wordlist of a chosen language dictionary.
- Choose a state for a custom dictionary. Two values are possible: Enabled or Disabled.
| Anchor | ||||
|---|---|---|---|---|
|
| Note |
|---|
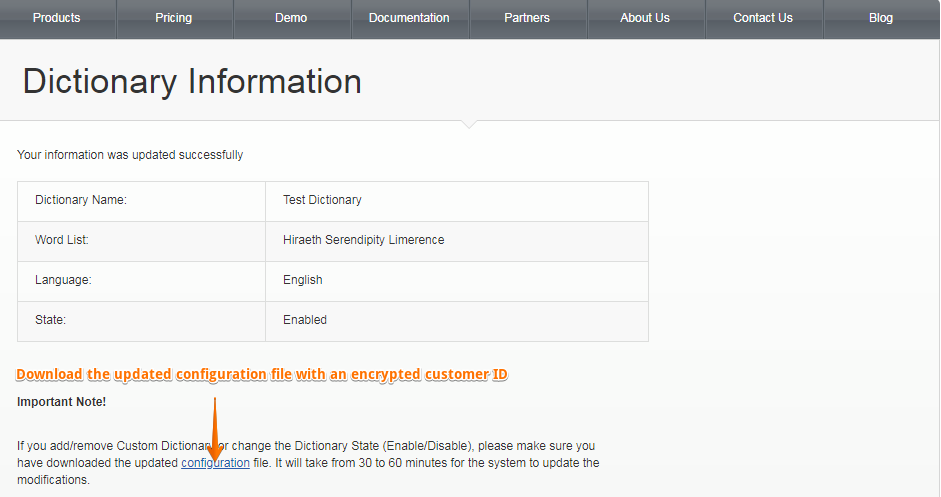
Let us remind that the information about custom dictionaries is encoded in an encrypted customer ID key. If you add a new custom dictionary, or delete an existing one or just change the language or state of a dictionary from Enabled to Disable or vice versa, it changes the information about custom dictionary(ies), and an encrypted customer ID key accordingly. Thus, in order to apply your changes, you are required to obtain the latest version of your encrypted customer ID and update the old key in your configuration with a new one. |
- Download a new configuration file (config.ini) which contains your regenerated encrypted customer ID key.
| Tip |
|---|
There are several options how you can do it:
|
- Update your current encrypted customer ID with a new one in the service configuration on your web page or web app.
4.4. Verify the work of custom dictionary functionality.
| Note |
|---|
Usually it takes up 30 minutes for such changes to go into effect on the WebSpellChecker Cloud servers. |
- Before trying to test the work of a new custom dictionary, it is strongly recommended to clean your browser cache.
- Go to your web page and enter a sentence or a list of words that have been added with a new custom dictionary. The words that are present in your custom dictionary should be considered as correct. Moreover, if you try to misspell any of these words, in a correction box your should get a correct word as a suggestion for correction.
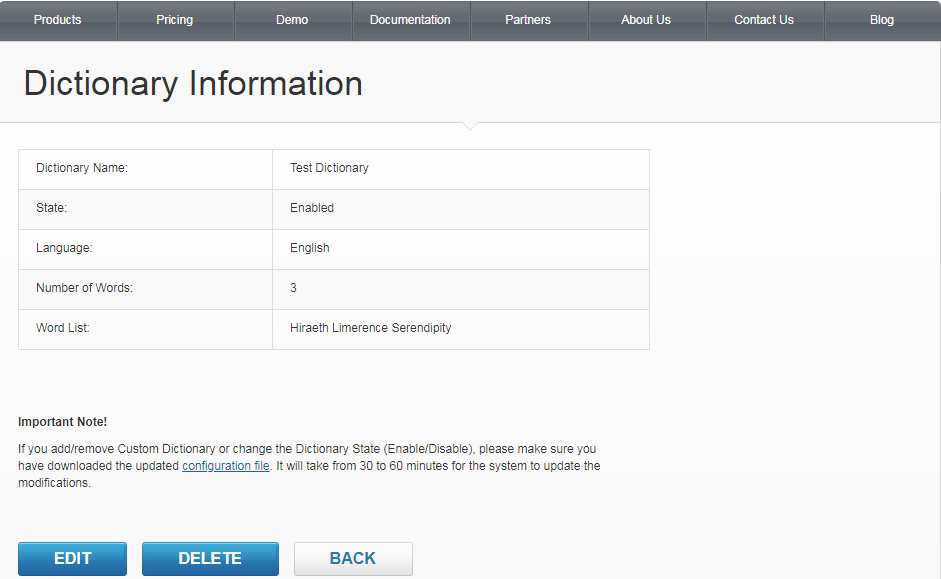
5. Edit Custom Dictionary
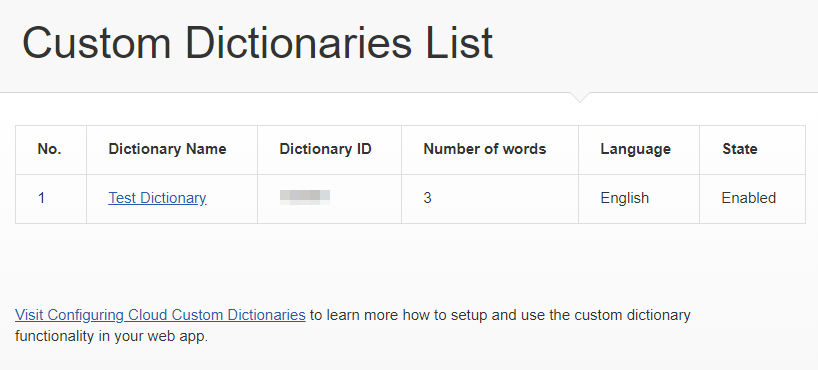
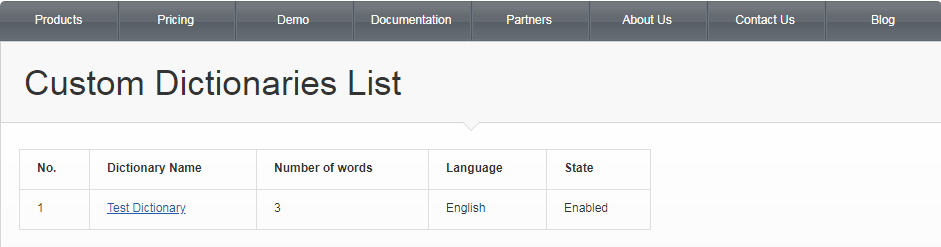
5.1. Go to the Dictionaries section and click List of Custom Dictionaries. This page displays the list of all available custom dictionaries.
5.2. Select the dictionary you want to modify (e.g. add new words) and on the dictionary page click Edit.
5.3. Modify the required fields (e.g. add new words). As all the changes are ready, click Save.

| Note |
|---|
There is no need to regenerate your encrypted customer ID in the next cases:
If none of these applies, the update of your encrypted customer ID is required in to apply changes. |
6. Delete Custom Dictionary
6.1. Go to the Dictionaries section and click List of Custom Dictionaries. This page displays the list of all available custom dictionaries.
6.2. Select the dictionary you want to delete and on the dictionary page click Delete and confirm your choice.
6.3. Apply the changes made to the service configuration on your web page or web app (see more details on section 4.3) .
- Download a new configuration file (config.ini) which contains your regenerated encrypted customer ID key.
- Update your current encrypted customer ID with a new one in the service configuration on your web page or web app.
7.
Custom Dictionary VerificationVerify Work of Custom Dictionary
Once all the changes are made, and required time for the changes to take effect passed, make sure that your custom dictionary works as expected.
76.1. Open any demo page with instance, which contains WSC/SCAYT products
6.2. Write a new words – they shouldn't underlined with the red line
6.3. Make mistake in any of them and check the suggestions. Words from the Custom Dictionary are in the drop-down suggestion list.
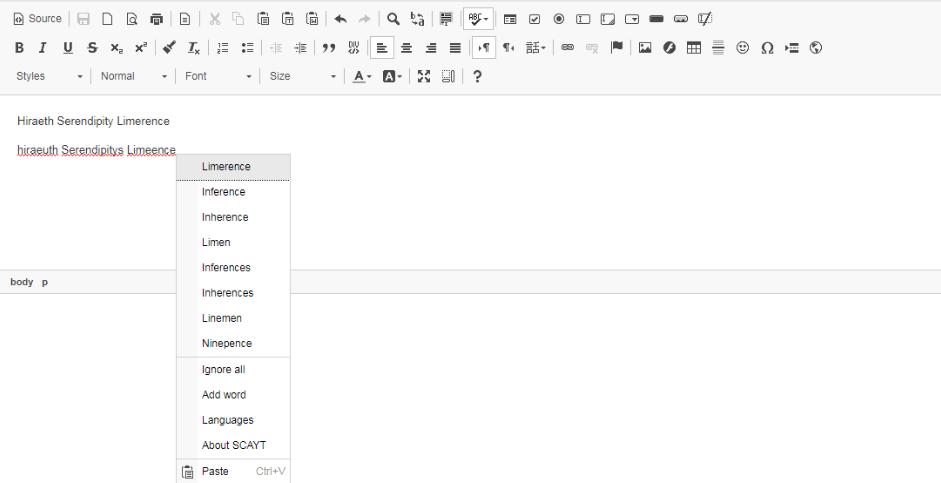
a web page with enabled one of the WebSpellChecker products.
7.2. In the editable field, enter a sentence or just a list of words that were added a dictionary. Those words won't be underlined as incorrect. Moreover, if you try to make a spelling mistake in any of the words, in the list of corrections you should be suggested the word from your custom dictionary.